What makes Jathara Parivrtti a “superpose”?
Have you heard the term superfood? It is usually used to describe a nutrient-rich food that is especially beneficial for our health and well-being. I adopted this term to describe certain yoga poses as “superposes” because they also carry an incredible “nutritional value” for our bodies.
What makes a pose a “superpose”? Surprisingly, it is not the difficulty or intricacy of body part arrangement and not even the strength or uber-stretchiness that one needs to exhibit to do them. In fact, most superposes are quite simple. What makes them powerful is their incredible diversity. The purpose of any yoga pose is to carry maximum benefit for YOUR body with minimum risk.
A superpose is a pose that:
- Can deliver the benefits for many different body parts at the same time (“benefit-dense”)
- Is accessible to most students
- Can be modified easily to emphasize the effect for a particular area
- Can be adapted easily to accommodate different body shapes, physical abilities, student preferences, and so on.
There are about 15-20 superposes out there, and if we choose to build our yoga practice on those instead of chasing after the fancy exotic ones, we will end up with a rich, satisfying, and “nutrient-dense” practice.
Today, we will take a look at one of those superposes, Jathara Parivrtti, and the qualities that make this pose so special.
Let’s get something out of the way first. In the traditional form of Jathara Parivrtti, you would have your legs straight, feet together, and one hand holding on to your top foot.
To be able to do this pose effectively, you would need to have very strong core and be very precise with movement. Because of the significant leg leverage it poses risks to the lower back, sacrum, hips and neck and introduces a very strong hamstring pull. Because of all that, we rarely do this pose in its traditional form.
In the two most common versions of Jathara Parivrtti we either keep the knees bent and together, or we keep one knee bent and another leg straight. Today we will be talking about Jathara Parivrtti with knees bent.
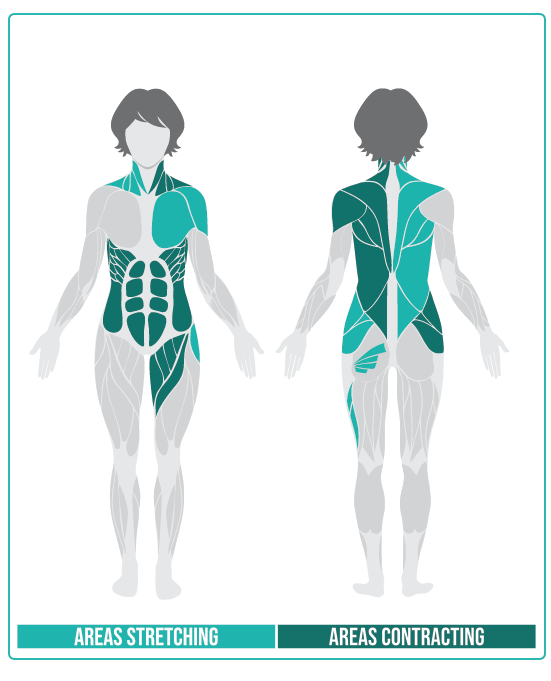
In this version of the pose, Jathara Parivrtti works great for rotating the spine and stretching the muscles of the lower back. If you change arm movement, you can target the upper back, shoulders, and neck; if you change leg position and movement, you can work with abductors, rotators, hip flexors, and hamstrings. Let’s take a closer look.
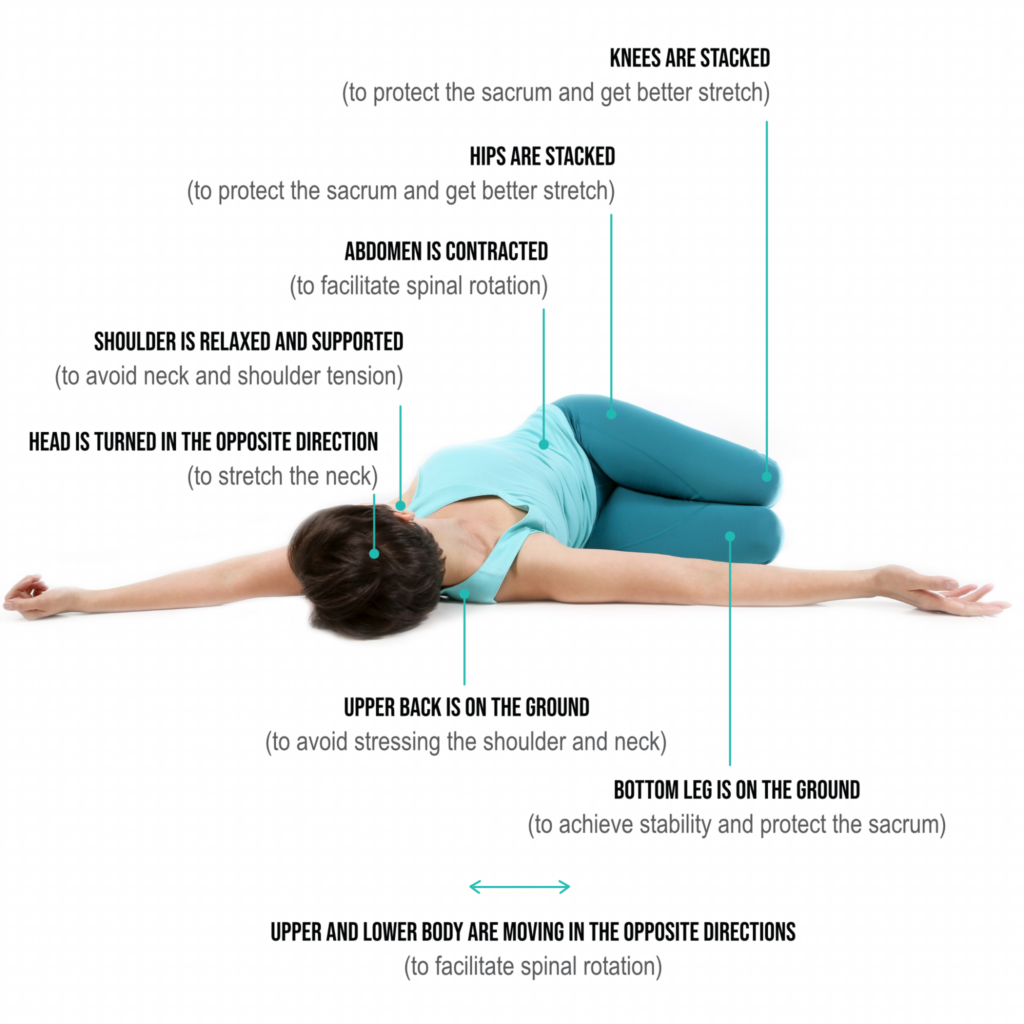
We usually do this pose to
- Rotate the spine (to lubricate the discs and build strength and flexibility in spinal musculature)
- Stretch the lower back muscles one side at a time
- Stretch and strengthen the core musculature (abdomen, obliques, and quadratus lumborum)
- Realign the relationship between the shoulder girdle and the spine
- Realign the relationship between the pelvic girdle and the spine
- Provide visceral compression of the abdomen.
Here is how we do the pose
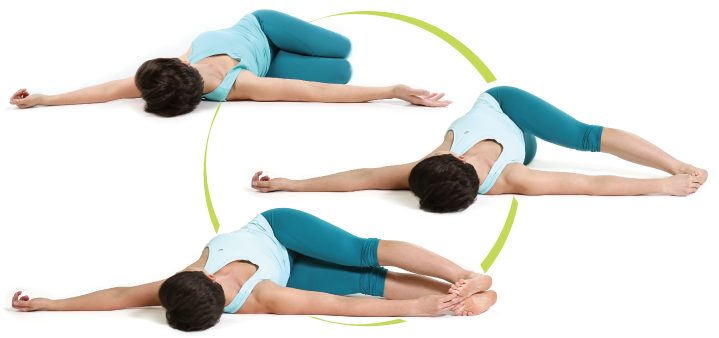
Begin on your back with arms extended out, legs raised, and knees bent.
Inhale: Lengthen the spine
Exhale: Gradually contract the abdomen as you slowly lower your legs down to your right simultaneously turning your head to the left (the knees do not have to touch the ground).
Inhale: Raise your legs back up, keeping the upper body on the floor.
Exhale: Gradually contract the abdomen as you slowly lower your legs down to your left simultaneously turning your head to the right.
Continue to move like that with your breath. After several repetitions stay in the pose.
Inhale: Lengthen the spine
Exhale: Progressively contract your abdomen and turn you lower body a little further to your right (trying to stack the knees on top of each other) and your upper body to the left (trying to keep the upper body on the floor).
Some students will need support in this pose. If the knees cannot reach the floor, you can place a blanket, bolster, or block under the knees (A). If the shoulder keeps lifting off the ground, you can elevate the knees and/or rest the top hand on the top hip to avoid shoulder strain (B). If turning the head to the left arches or tightens the neck, you can look to your right (C).

There are many different variations of the pose you can use to emphasize the work in different areas.
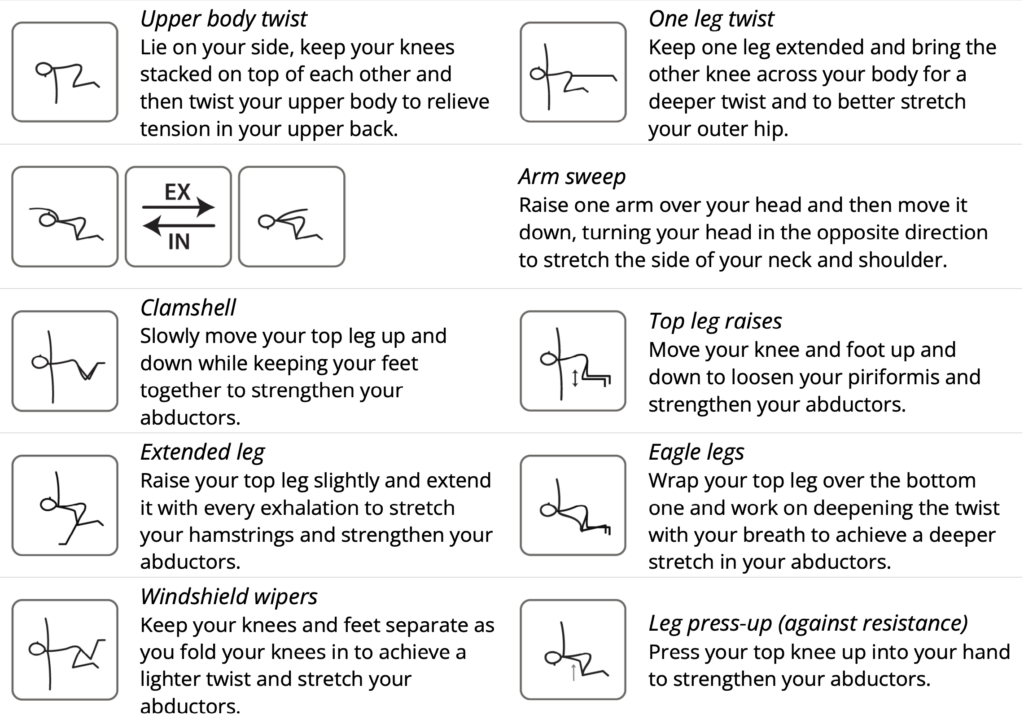
Isn’t it remarkable how many things you can do with this one pose?
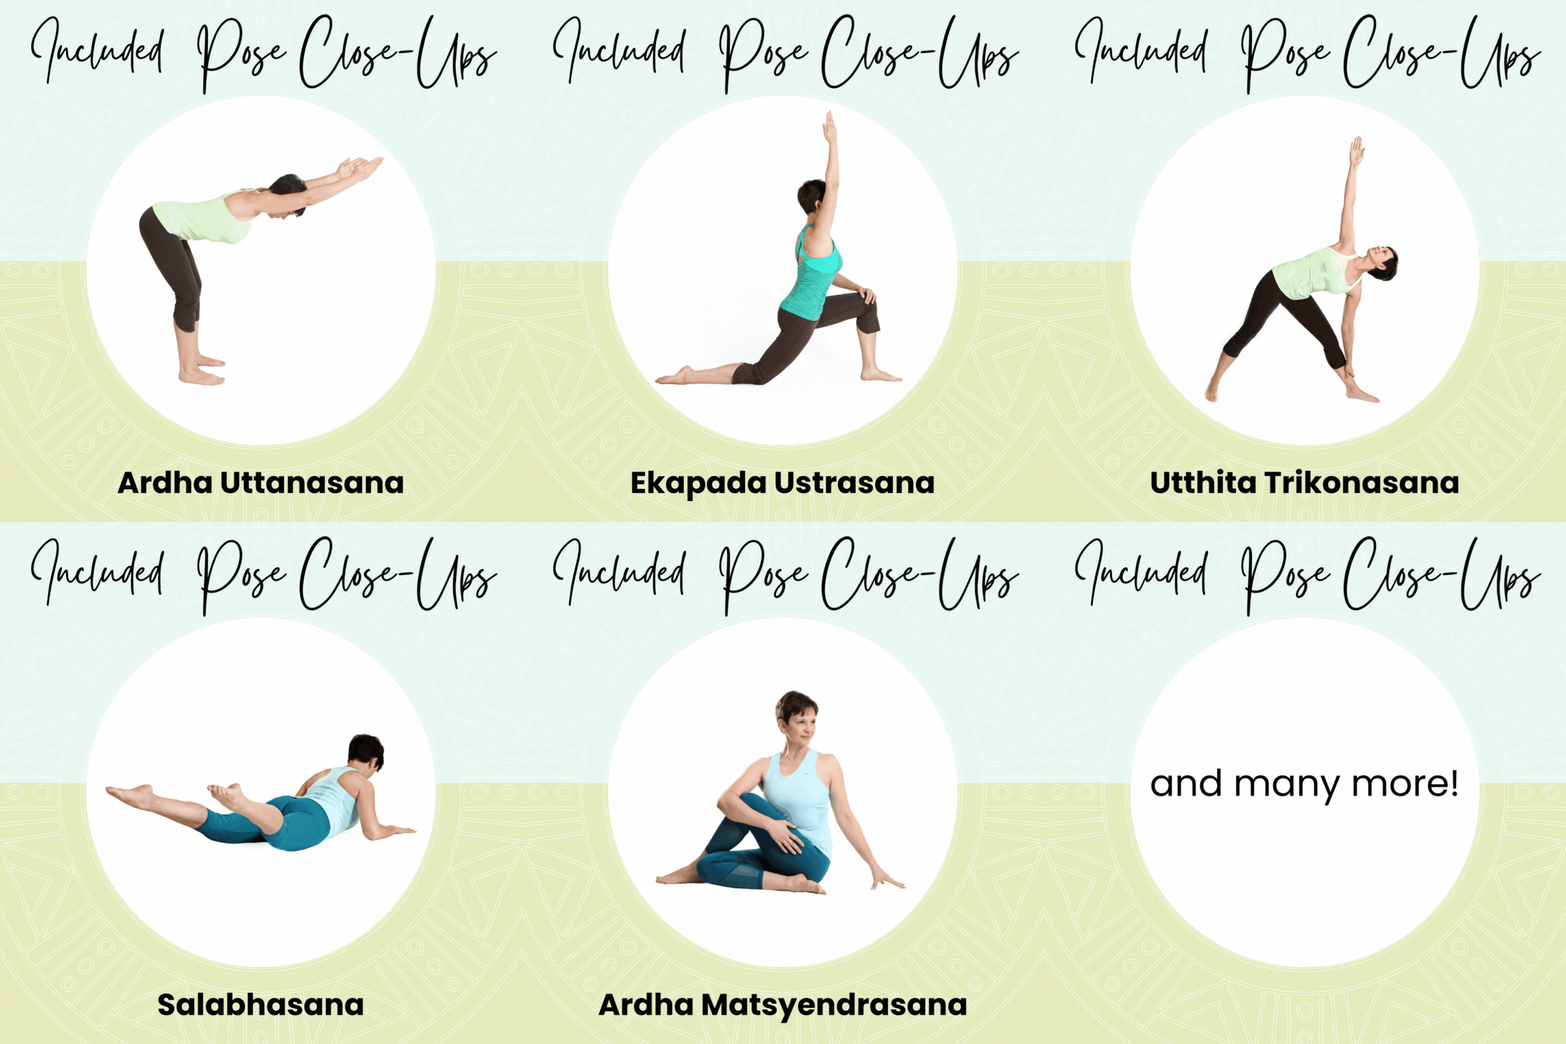
Do you want to get a similar breakdown of other yoga poses? Get more info on why we do a particular pose, how to position the body to get maximum benefit and how to adapt the pose for various students, situations and desired effects.






Hari Om Olgaji
Thanks a lot for Such Enlightened insights into this ‘ ‘Superpose’. Could you detail other 10 odd ‘Superposes’ . This would definitely help in formulating a comprehensive session practice.
Also, I had mentioned earlier, I would like to understand detox and sweating as related to a yoga session practice.
Yogicly
Abhinandan
Hi Abhihandan! my list of “superposes” includes Vajrasana, Chakravakasana, Bhujangasana, Salabhasana, Vimanasana, Virabhadrasana 1, Jatthara Parivrtti, Dvipada Pitham, Utthita Trikonasana, Trikonasana Parivrtti, Uttanasana and Upavista Konasana. And yes, we will be talking about sweating and detoxing soon!
I absolutely loved this! It’s interesting the different movements added to strengthen abductors; open piriformis, etc! Love it, and thank you for continuing with this amazing site!!!
Thank you Kimberly! Yep, we can be really creative with this one!
Such a beneficial posture, one that is accessible to most, love your suggestions and insight! I love playing with the palm rotation here and Breath.
Thank you for great additions Haidee!
Thanks for this fantastic information! I love the concept of superposes. I am just wondering though if there is a reason why you started on the right side and then the left? I have always been taught that when twisting you should always twist the ascending colon before the descending colon, which would mean you always twist the right side of your body first. In this pose, when our knees are to the right we are actually twisting the left side of our body… Not trying to be fussy I am genuinely wondering what your thoughts are on this?
Thank you so much
Hi Ivana – thank you for your comment! I don’t think that this is being fussy at all :), but let’s save this question for now. In couple of weeks we will be talking about physiological effects of twists, including digestion, so I will address it then. And afterwards I would love to hear your response to it!
I will look forward to it 🙂
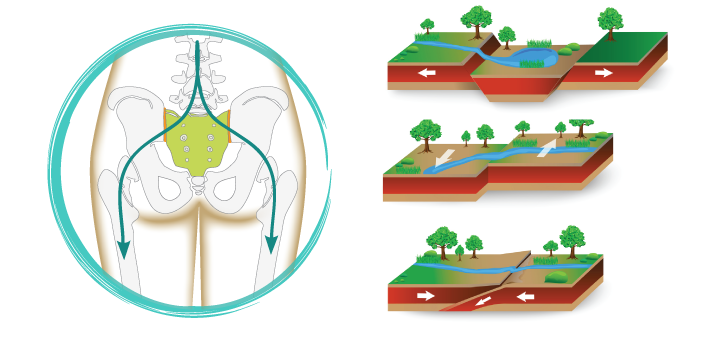
Olga, While I wholeheartedly agree that the leg leverage risks to lower back, sacrum etc. , I agree knees should be bent. You mention a version where one leg is straightened and this is the way I always instruct YogAlign students to do it. I think there is a resemblance to chair sitting position when both knees bend creating a 90 degree angle from legs to torso. If the bottom leg has an extended knee and ankle, the lumbar spine is less compressed in flexion and the top leg should always rest at least 4 inches off the floor. If the flexed knee is lifted off the floor, this protects the sacral joint. I feel too many yoga poses loosen the SI joint and legs to the floor is one of them. I agree totally that this pose should never be done with straight knees or flexed ankles. One more way I explore keeping the spine decompressed while twisting is to inhale into the twist. The shortening of the anterior flexor chain that naturally happens in exhalation also reverses the lumbar curve. So twisting with an exhale is what I advise YogAlign students to avoid. Why? It creates a shortening of the spine which could compress the discs and nerve roots. The lumbar spine has little rotational movement compared to the thoracic and so any twisting should keep the lumbar from compression. Exhaling creates lumbar flexion so in the YogAlign method, we always inhale into a twist.
I’ve read over and over that this is a the safest twist, but it hurts my low back every time. Standing and seated twists feel much better. Any idea why? The one version you list that feels stretchy in a good way and not painful is to keep the lower body stable, twist the upper body, and allow the shoulder to be away from the floor a bit. I’d never done that before, but now I think I’ll do it every time my teachers offer the pose.
Thanks!
Hi Debbie! If it hurts don’t do it! Just because something is considered safer for the majority, doesn’t mean that it works for everyone. May be this is a vulnerable area for you. Or it’s possible that you have more mobility in your SI/lumbar area and things just slide out of place with this particular move. This is remedied if you keep the lower body stable and move the upper body instead (like in the adaptation you described). Be sure to keep the top hand supported by placing it on the hip so that the weight of the arm and shoulder doesn’t pull you in deeper then you want to go. Glad you could find something that you can substitute for the classic version in a class!
Hello, Olga — I’ve always so appreciated all I learn from you. But I am now a bit confused by the information in this segment. I will quote something from Judith Lasater — “When the pelvis is anchored to the floor at the sitting bones, the twisting must come solely from the spine, which means the sacrum is being dragged into the twist with the rest of the spine, while the pelvis is being held back and thus moves in the opposite direction.” This information has encouraged me to let the pelvis move a bit in a seated twist. But if I do Jathara parivrtti as you suggest and keep the knees together, am I not doing the same thing that Judith Lasater warns against — stabilizing the pelvis so that the twist must come from the spine, which means the sacrum is being dragged into the twist?