How to sequence a class for the Shoulderstand
Leslie Kaminoff brings up an excellent point in his video: yoga sequencing is not the same as choreography. In choreography, the goal is artistic expression, and choices are dictated by elegance and aesthetic appeal. Of course, it’s nice when a yoga class flows gracefully, but that is not the main goal. We do not practice yoga to look pretty while at it but to get some benefit, whether it’s physical, physiological, or psycho-emotional. How we arrange poses and other elements in a yoga practice is determined by what we want to accomplish and how we can get there effectively with minimum risk to the body.
Let’s use the Sarvangasana (Shoulderstand) to illustrate the process of class planning for maximum benefit and minimum risk. We’ll call it a 5-step sequence planner (it’s applicable to any other posture).
Step 1: Pose analysis
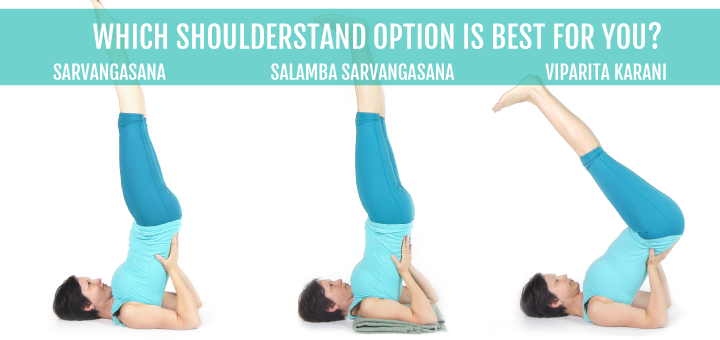
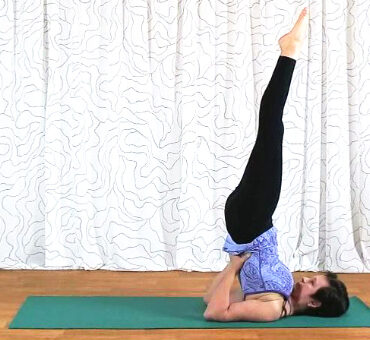
Shoulderstand is a risky posture because your neck is placed in a vulnerable position. It can strain the muscles, ligaments and nerves of the neck. To minimize the risk for your neck, you might choose to place a blanket under the upper back (as in Salamba Sarvangasana) or shift the weight from the neck more toward the upper back (as in Viparita Karani).
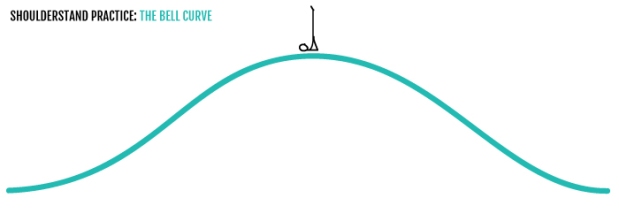
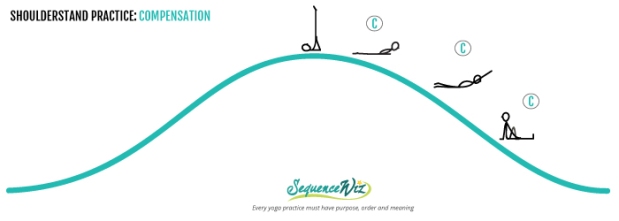
 Whichever option you choose, it’s not safe to start with it and it is not safe to put it at the very end of the practice. To do Shoulderstand safely, you need to have strong upper back and lower back muscles, and core musculature. The traditional presentation of a yoga practice involving inversions (outlined by Sri Krishnamacharya) looks like a bell curve with a Shoulderstand at the top. We do other poses to prepare the neck and upper back for the load they are about to bear and compensate for it.

Step 2: Preparation
It might take some time to develop the strength of the upper back, lower back and core musculature (not within a space of one class). We call it “long-term preparation” and it involves using other, less risky poses to strengthen the target areas.
“Short-term preparation” describes the choices you make within the space of one class leading up to the Shoulderstand. The minimum preparation that we have to do before attempting this pose includes:
- Forward bends to stretch the lower back
- Twists or lateral bends to warm up the neck, shoulders, and upper back
- Some “legs up” pose to introduce the inversion effect
- Bridge pose to stretch the upper back and neck right before the Shoulderstand
Contrary to popular belief, Halasana (Plow pose) is NOT a good preparation for Shoulderstand because it puts the neck and spinal extensors into a MORE strenuous position.
Step 3: Assessment
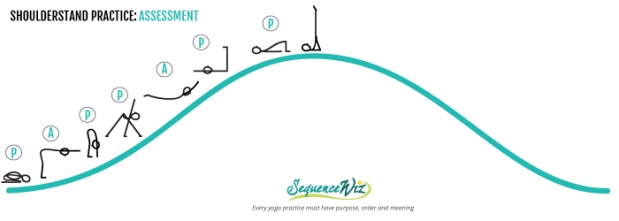
It is important to include poses that will demonstrate whether or not the student is ready to do Shoulderstand on that particular day. We use Ardha Uttanasana and Salabhasana to access the strength of the neck, upper back and lower back. The student should be able to hold each one of them in good form for at least three breaths. If that’s not possible, Shoulderstand is not recommended.
Step 4: Compensation
Compensation means taking steps to help the body return back to a neutral state. If you bend deeply one way, afterward, bend the other way to balance it out. A common compensation pose for Shoulderstand is Matsyasana (Fish pose), but it isn’t the best choice. Yes, the Fish pose places the neck and upper back in the opposite position from the Shoulderstand. The problem is that you lock your upper body in place, and the muscles at the back of the neck stay passive. A better option is to MOVE the body in the opposite direction (instead of locking it there) to restore the contractile power of the muscles that were intensely stretched in the Shoulderstand. In other words, we need to actively engage posterior neck muscles and upper back to increase blood flow to the area and do it in a way that is not as stressful and passive as Fish pose. Bhujangasana (Cobra pose) is an excellent choice. However, the Cobra pose is not enough; we also need to mobilize the arms that were locked in the Shoulderstand with some arm-sweeping motion and rebalance the relationship between the neck, shoulders, and upper back with some simple twist.
Step 5: Reevaluation.
Once we look at the poses we’ve selected so far, we will notice that we need to include some other compensatory poses to neutralize the effect of the more difficult postures. For example, we usually put some sort of a forward bend after a deep back bend or a twist. In addition, we might need a bit more warming up before we attempt poses like Ardha Uttansana; and we will also include Savasana at the end to rest and integrate.
And there you have it. This is a basic outline of the Shoulderstand practice with adequate preparation, compensation, and no random elements. Theoretically, this kind of thinking should go into the design of every yoga practice. Of course, even with all those elements in place, Shoulderstand is still not safe for everyone. Some contraindications include disc problems, high blood pressure, glaucoma, sinus blockage, obesity, and general weakness in the upper back/shoulders/neck. Read more about risks and benefits
If you choose to teach and practice Shoulderstand, please be mindful of those risks and take care of yourself and your students!
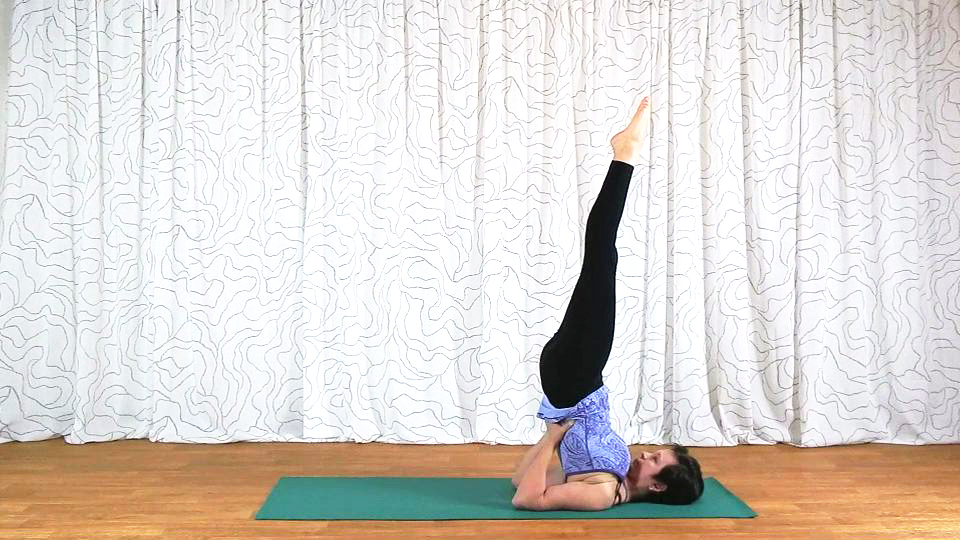
Check out an example of a balanced Shoulderstand practice.







Amazing place that you have, congratulations!
Thank you Lourdes!
Great article and very informative. But I did notice one point that I think may be a typo- In the diagram it says that shoulder should be in ‘internal rotation”. I believe that should be external rotation. Internal rotation would cause the chest to collapse which is the opposite action needed in Shoulderstand where chest should be lifted. I’d appreciate your thoughts on this. I love your website BTW!
Hi Liz, thank you for your comment! There is no typo here, but I wonder if we are talking about different things. When you are in a Shoulderstand your shoulder is rotated internally because your elbow is behind you. It’s the same set up if you were doing warrior 2 for example with your arms extended back and fingers interlaced. In that position, if you wanted to rotate the shoulders outward you would turn the elbow creases and palms outward, away from each other. This joint position is not even possible in Shoulderstand. I think what you are talking about is rounding the shoulders forward that can happen and can facilitate the chest collapse, is that correct? Regardless of whether or not the shoulders are rounded forward, the joint itself will be in the internal rotation simply because of the placement of the upper arm. Does that make sense?
I am so i glad I found this site, all articles are very detailed, and informative ! I love it so much and it is helping me alot in my training. Thank you !
Thank you Ruth! So happy to hear that you find my posts useful. Welcome to our community!
Great post! Very helpful and informative, especially for someone learning to teach.
This article is extremely helpful – thank you! But can you tell me what the letters P, A, and C next to the poses represent?
Hi Amanda, happy to hear that the post was useful for you! P means “preparation”, A means “assessment”, and C means compensation. I just use those to illustrate the points I am making in the article.
Hi Olga, I found your article very helpful thank you but I am prompted to comment about your warning concerning high blood pressure as a contraindication. to shoulderstand practice. I looked at Mr Iyengar’s Light on Yoga and his view was that “Due to soothing effect of the pose on the nerves, those suffering from hypertension, irritation, shortness of temper, nervous breakdown and insomnia are relieved.” Have you any comments please? I presume that everyone is different and it is hard to generalise although I wonder if someone is so vulnerable with hypertension for the shoulderstand to be contraindicated how would one know? I appreciate that safety is paramount but who is best qualified decide what is beneficial or harmful because there is surely not a situation where one size fits all?
This is a very comprehensive understanding of yoga and poses and I thank you so much for posting this information. I just started practicing on my own using YouTube videos and what I remember from classes I have taken years ago. I’m learning so much from this blog.
I always had this suspicious about fish pose, generally most of the yoga teachers invited to practice it after Sarvangasana and it is no comfortable for me at all. Today a found this website and solved it. Thank you.
Amazing info , for peak.pose sequences